Since you get started with Facebook ads, you need to know about few important things, that helps you make your adverts more and more optimized and helps you save some good cash. Facebook Pixels is one of the important tools that should not be ignored while dealing with Ads over Facebook. For those who are not sure what Facebook Pixel is and how it can be helpful, this article can be a good read.
Knowing Facebook Pixel
Facebook pixel is an analytical tool that can be placed on your website. It helps you to find out how many conversions were made from Facebook ads, it helps you optimize your ads on the basis of data that was collected by pixel moreover it helps you create better audience for your future ads.
Facebook launched the Pixel API back in 2015 which was combined result of Conversion Tracking and Custom Audience Pixels and that no longer in use now. It got obsolete in Feb 2017.
Pixel is Javascript code that can be integrated to your website. It may sound a bit complicated to some of you guys but in actual its quite simple and easy to use. Pixels once integrated in your website it will keep an eye on all the activities made on every page of your website by a Facebook user.
The data collected from Pixels can be used for
- Show your ads to the right people
- Build audience for your ads
- Unlock additional advert tools by Facebook
- Track all the activities made onto your website
Advantage of Facebook Pixels
Tracking the conversions, helps you to know how well your Adverts are performing linked to your website. With the available data from Pixels you are able to determine demographics, locations and devices that are driving your conversions. You are able to go deep into that data exactly knowing from where conversion are coming so you could target your ads to those area which would give the best results.
How Pixels Work?
A piece of javascript code, that Facebook provides you once pixel is created, is placed on each and every page of your website. When someone comes to your website that javascript code will be triggered and start doing its job and will record all actions on the page even a click of a button.
Setup Facebook Pixels
- Go to your Facebook Ad manager, Click on 3 dashed lines button found on top left of the screen. From the popup menu under assets you will find Pixels. Click on Pixels
![]()
- You will find an intro screen to Pixels. Find the green button named “Create a Pixel“. Click on it to create one
![]()
- A popup screen will be shown up asking you the name for the Pixel. But wait, you will see that your Pixel name pre populated with your own name and you cannot edit the name. You are only able to create one pixel per ad account. To create more you will need to upgrade to business manager. Click on create button to continue.
![]()
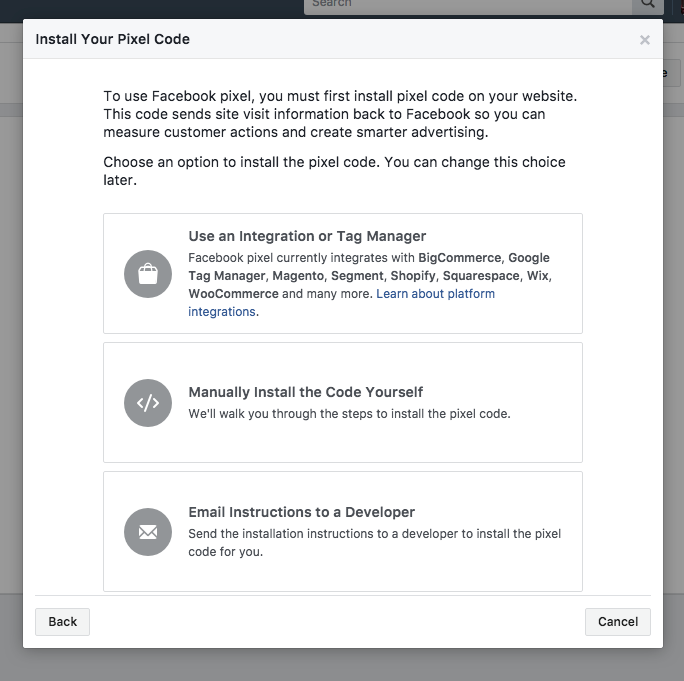
- Once your Pixel is created Facebook will ask you to add it your website with three available options.
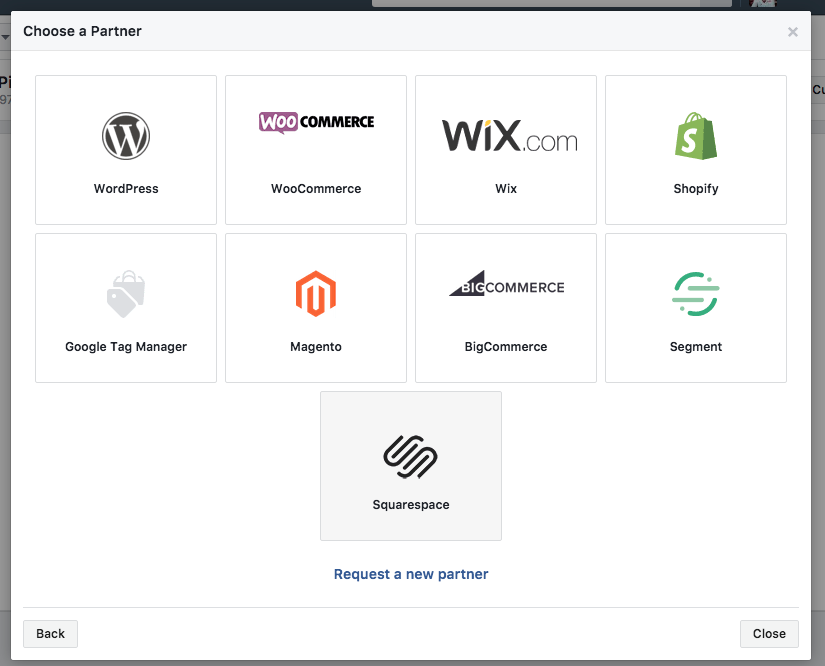
- If we go for option 1 i-e Use an Integration or Tag manager, Facebook will show the list of available partners. You can select your desired partner site. For example if you go for the WordPress, Facebook will ask you install the desired plugin onto your WordPress site and Activate the plugin to start Pixels. You can click on any of the partner website and clear instructions are provided on how to integrate to your partner website.
![]()
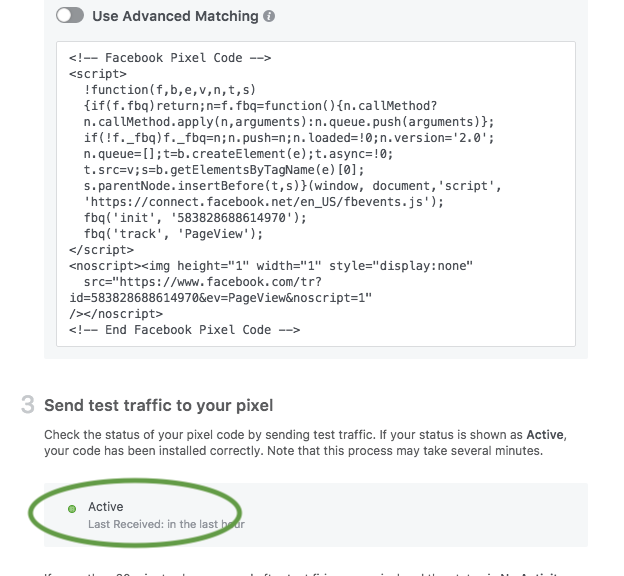
- If you go for option number 2 that is manual integration, Facebook will provide you the piece of code that you will have to paste onto your website in between <head></head> tags.
- Lets Test out the manual integration. Currently i haven’t added manual code to my website and you can see Pixel are not active marked in a green circle.
![]()
- We will use the above code that facebook has given us and paste it to our website Head Tag.
![]()
- Now we will test our website. If integration is successful Facebook will show an activity to you. Test URL (https://codearray.org/pixeltest.html)
![]()
- Lets Test out the manual integration. Currently i haven’t added manual code to my website and you can see Pixel are not active marked in a green circle.
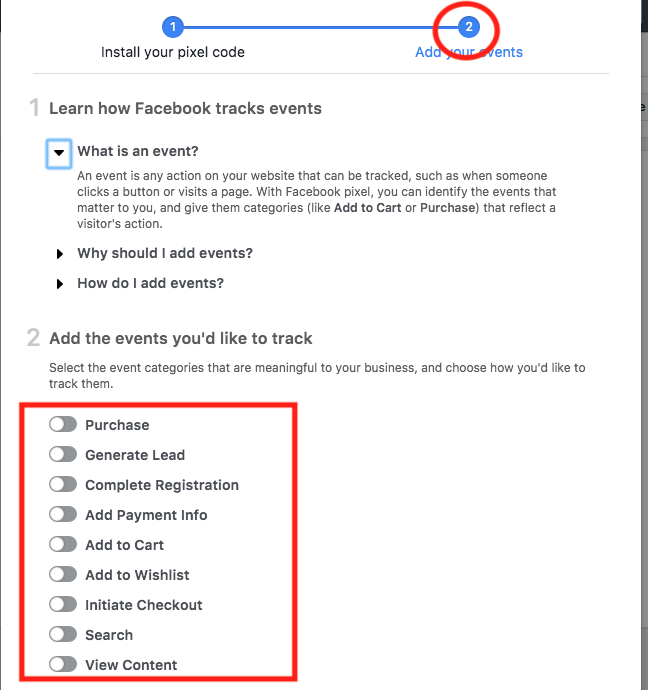
- Once you are successful in getting pixels activated you can now go for the second option that what actions would you want to integrate to your website basically called Events.
![]()
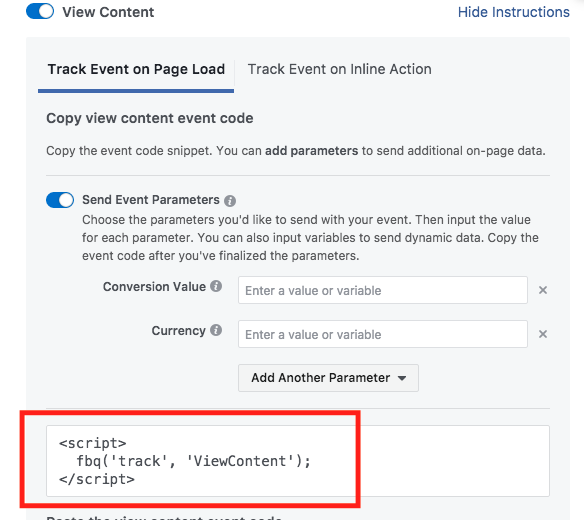
You have got a good list of events available in here. You can chose any one of the following from the list to start gathering your desired data. For this purpose you should have the basic understanding of Javascript and HTML. Lets suppose we go for View Content. Facebook will provide you with a piece of Javascript code that you will add to your website.
![]()
I integrated View Content Event onto my website and using a Google Chrome extension i am able to verify that my Pixels are working are required.
You can install the Google Chrome Extension called “Facebook Pixel Helper” and visit the URL https://codearray.org/pixeltest.html and get to know more details. You can see the event ViewContent that was integrated to the website is showing up in the list.
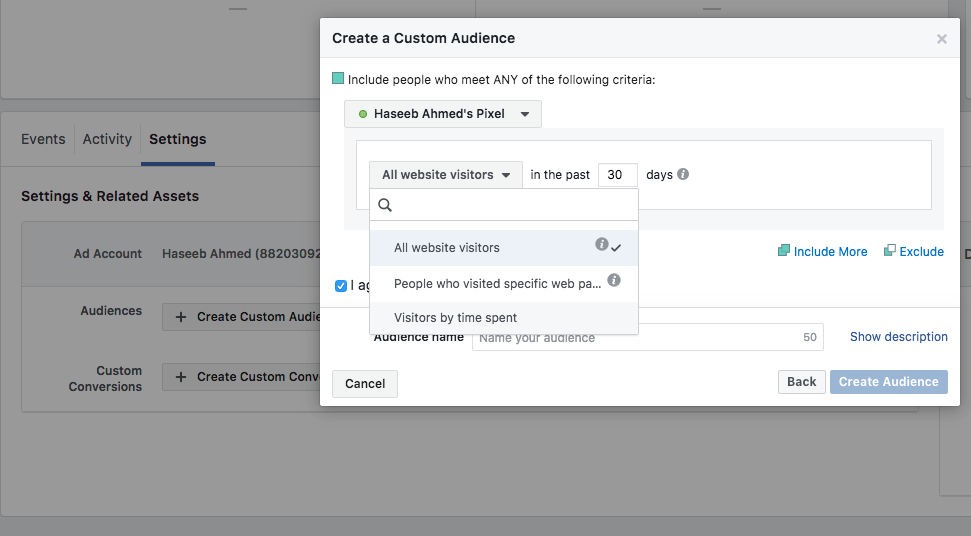
Back to Pixel Panel you will always be able to view from where people are coming from, which devices are they using what events are they performing and the great thing is that generating a well organised audience, is now a piece of cake.
You can see you have got the all available options. The great thing about Facebook Pixels is that you could even chose Visitors by Time Spent. So most probably the people who stay onto your website more are likely to be your well targeted audience.
That’s All Folks! You successfully gone through basic tutorials for Facebook Pixel.
- Design


